Tag Archives: git

Git Config Email String

This is about a simple problem that is obvious after the fact. I was having an issue with my commits on github.com not being linked to my github account. It seemed like I had set everything up (git email configured locally & e-mail set in my github.com account), but it wasn’t working.

On a mac, you probably know you can set your git user e-mail this way:

git config --global user.email name@domain.com

Following the github guide (https://help.github.com/articles/setting-your-commit-email-address-in-git/), I included quotes when setting my git config email.

git config --global user.email "name@domain.com"

It turns out that was a mistake for me since my commits were being associated with “name@domain.com” instead of name@domain.com. Note: the inclusion vs exclusion of quote characters.

After running the git config command above without quotes, I was able to properly link my commits on github to my github user profile.

Ruby Gems Tip: Check Your Version

Quick ruby gems tip:

If you are having issues with a gem (and it seems like the issue has been resolved in the github repo), double check your gem version.

Even though I had the latest version of a gem by having [cci]gem ‘leaflet-rails'[/cci] in my Gemfile, the latest version wasn’t bumped up at http://rubygems.org/ (Note: Nothing against leaflet-rails, which is awesome. They’re simply used as a recent, real-life example. )

You can make sure you’re using the latest version of a gem (as it appears on github) by specifying the repo & commit hash:

[cc]gem ‘leaflet-rails’, git: ‘git@github.com:axyjo/leaflet-rails.git’, ref: ‘0f50faaa35d41e8ba24c73c97d265e061b159d81′[/cc]

This will lock the specific commit in place in your Gemfile.lock

Github All the Things

socialite by cameronmcefee (http://octodex.github.com/socialite/)

socialite by cameronmcefee (http://octodex.github.com/socialite/)

As Github continues to take over the world, I wanted to share a couple creative ways Pull Requests have been used.

  1. Job Offer

    In January, Carrot Creative made a job offer via a pull request. When I found out about this at Flatiron School, I was ecstatic for Adam Jonas, and I was wondering if this was Carrot’s standard way giving job offers. Apparently, it’s not standard practice, but it’s awesome nonetheless.

  2. RSVP

    Gust is having a Ruby concurrency talk with José Valim in March. Their RSVP page had a simple message: send us a pull request.

    The instructions were super easy for any developer. Fork their repo, create a file with your contact info, and send them a pull request.

While these could have been handled by e-mail or one of the many channels of communication, using Github to do it is simply cool.

How to Close a Git Pull Request

With a git workflow, you become used to commands like [cci]git add filename[/cci] and [cci]git commit -m “add filename”[/cci]. When you maintain an open source project and get a pull request, the exact workflow may get murky. How do you review the pull request work? How do you accept the commit if it passes muster?

This post will cover how to review, accept, and close a GitHub pull request.

In our example, we are the creator of a popular open source project called breakfast-sandwich. In our rush to get the product out, we forgot a critical piece – the breakfast sandwich has no cheese! Luckily, our project is open source and we’ve already received a pull request to add cheese to our sandwich.

Here’s the ingredients [cci]list.txt[/cci] file initial state, missing cheese:

[cc]# ingredients list
* english muffin
* eggs
* sausage [/cc]

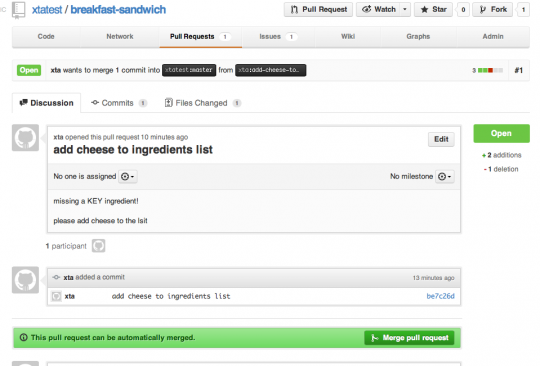
Here’s the pull request on GitHub:
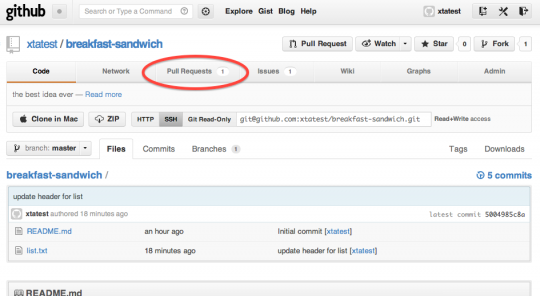
Pull Request

A pull request received

The Pull Request detail

The Pull Request detail

1. Add the fork’s pull request repo as a remote

[cc]$ git remote add xta https://github.com/xta/breakfast-sandwich.git[/cc]

You can verify that the remote [cci]xta[/cci] has been added by running the [cci]git remote[/cci] command.

2. Fetch the git data from remote

[cc]$ git fetch xta
remote: Counting objects: 5, done.
remote: Compressing objects: 100% (3/3), done.
remote: Total 3 (delta 0), reused 3 (delta 0)
Unpacking objects: 100% (3/3), done.
From https://github.com/xta/breakfast-sandwich
* [new branch] add-cheese-to-list -> xta/add-cheese-to-list
* [new branch] master -> xta/master[/cc]

3. Checkout the remote branch

[cc]$ git co xta/master
Note: checking out ‘xta/master’.
You are in ‘detached HEAD’ state. You can look around, make experimental
changes and commit them, and you can discard any commits you make in this
state without impacting any branches by performing another checkout.
If you want to create a new branch to retain commits you create, you may
do so (now or later) by using -b with the checkout command again. Example:
git checkout -b new_branch_name
HEAD is now at be7c26d… add cheese to ingredients list[/cc]

4. Checkout to a new test branch

[cc]$ git co -b “test-add-ingredient”
Switched to a new branch ‘test-add-ingredient'[/cc]

5. Test the current branch

For this step, you would need to perform whatever steps your project deems appropriate before accepting a pull request.

We can open up [cci]list.txt[/cci] and see that it now contains cheese:

[cc]# ingredients list
* english muffin
* eggs
* sausage
* cheese[/cc]

As the updated ingredients from [cci]xta/master[/cci] pass our critiera, we need to merge it back into master branch.

6. Check your feature branch against master to make sure any merge conflicts happen in your feature branch

[cc]$ git rebase master
Current branch test-add-ingredient is up to date.[/cc]

7. Merge feature branch into master

First, switch to master branch:

[cc]$ git co master
Switched to branch ‘master'[/cc]

Then merge the feature branch into master.

[cc]$ git merge test-add-ingredient
Updating 5004985..be7c26d
Fast-forward
list.txt | 3 ++-
1 file changed, 2 insertions(+), 1 deletion(-)[/cc]

8. Push your master onto GitHub

Great job! We’ve reviewed the feature branch, merged it into master locally. So now, we need to make sure the internet has access to our open source breakfast sandwich that includes cheese.

[cc]$ git push
Counting objects: 5, done.
Delta compression using up to 4 threads.
Compressing objects: 100% (3/3), done.
Writing objects: 100% (3/3), 343 bytes, done.
Total 3 (delta 0), reused 0 (delta 0)
To git@github-xtatest:xtatest/breakfast-sandwich.git
5004985..be7c26d master -> master[/cc]

When you look at your GitHub repo, you’ll see that the pull request is now closed. Most importantly, our breakfast sandwich has cheese!
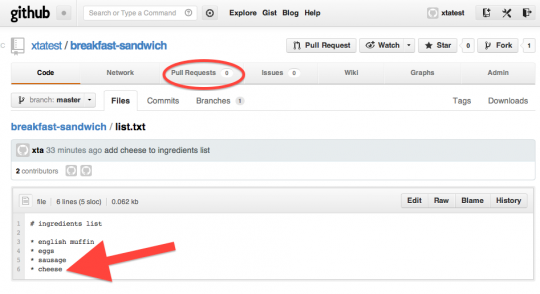
Closed Pull Request
Closed Pull Request

Installing Rails 3 on Windows 7

This post is to document, how I got Ruby on Rails 3 up and running. Each time I have had to install this, (due to my non-technical background) it has been an arduous process. Note that I am reading the free online Rails book as my rails tutorial and I’m using generic Windows 7.

  1. Install Ruby 1.8.7

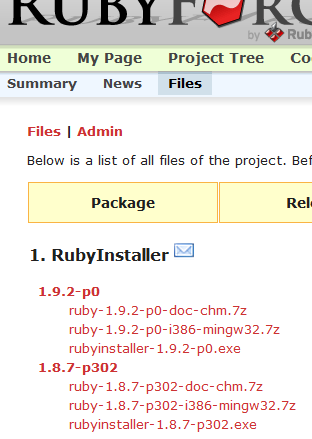
    I downloaded the .exe file for version 1.8.7-p302.

    
    After googling for a few seconds, I still can’t figure out the difference between: 1.8.7-p302, 1.8.7-p299, and 1.8.7-p249. No matter, moving along now.

    Run the installer that you downloaded by double clicking on the file.
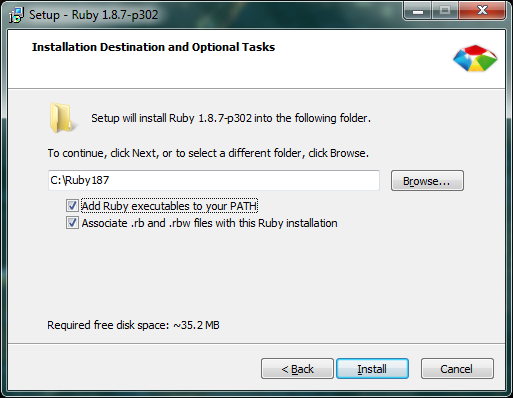
    I opted to check both of these boxes during the installer:

    When the installation finishes, check the Command Line to verify that Ruby is installed. To get to the Command Line, press the Windows Key, type “cmd” and press Enter.

    Type “ruby -v” and you should get the box below. Ruby is installed.

  2. Install RubyGems 1.3.7

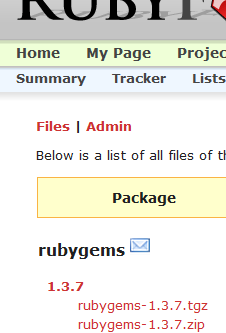
    Download the .zip file for version 1.3.7.

    Extract the .zip file and place the the folder “rubygems-1.3.7”  in your Ruby directory. For me, the Ruby directory would be C:/Ruby187/

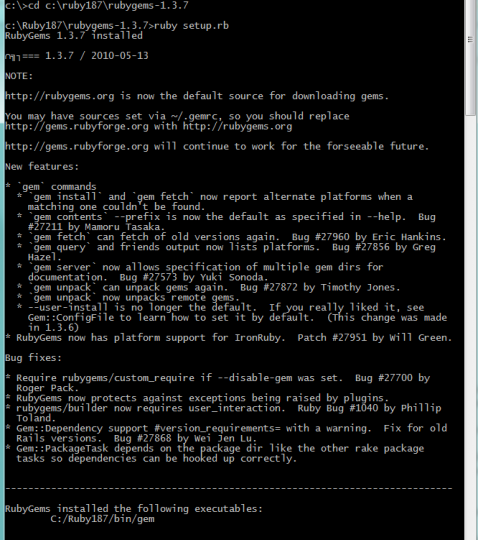
    Open up the command line and navigate to your “rubygems-1.3.7” folder. To change directory, type in “cd” followed by the location. In my screenshot, I typed in “cd C:/ruby187/rubygems-1.3.7/” since the location of my “setup.rb” file was in C:/ruby187/rubygems-1.3.7/

    Type “ruby setup.rb” to install RubyGems

  3. Install Rails

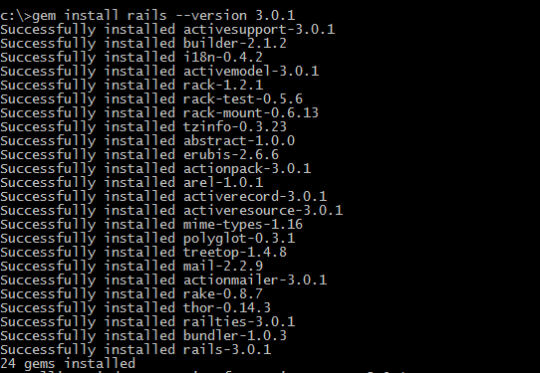
    In the Command Line, type “gem install rails –version 3.0.1”

    When the installation finishes, check the Command Line to verify that Rails  is installed.
    Type “rails -v” and you should get the box below. Rails is installed.

    Congratulations, you’re all RoR’d ups in this place.

  4. Install Git (Optional Step)

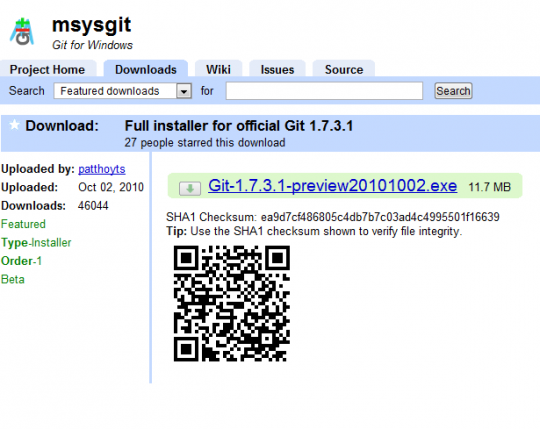
    Grab the latest version of Git. I went with v1.7.3.2. The installer was pretty painless and just involved clicking through the options.

In retrospect, installing Ruby on Rails 3 was not so bad. While I did spend a few hours googling, installing, and documenting the process – the good news is that the process itself is not so bad if you know what files to grab, what to click, and what exactly to type.